
Learn how to build a gaming PC step-by-step in 2025! From choosing parts to assembling your rig, this beginner-friendly guide covers everything you need for a smooth, cost-effective build. Start gaming like a pro today!
Introduction: How to Build a Gaming PC
Building your gaming PC is a thrilling journey that blends creativity, technical skill, and the joy of crafting something uniquely yours. Whether you’re a beginner or an expert, a custom build offers unmatched benefits like cost savings, performance control, and future-proofing.
This step-by-step guide will equip you with the knowledge to assemble a powerful gaming rig, from choosing the right CPU and GPU to mastering cable management and troubleshooting.
Learn how to pick compatible parts, avoid mistakes, and optimize your setup for peak gaming performance. By the end, you’ll have a high-performance PC and the pride of building it yourself. Let’s get started!
Pre-Build Prep: Don’t Skip These!
Before embarking on the assembly of a gaming PC, thorough preparation is essential to ensure a seamless and successful build. This phase, often overlooked by beginners, lays the foundation for a smooth construction process and minimizes the risk of errors or component damage. Below, we outline the critical steps and considerations every builder must address during the pre-build preparation stage.
1. Gather Essential Tools and Materials
A properly prepared workspace is essential. Make sure you have these tools ready before starting:
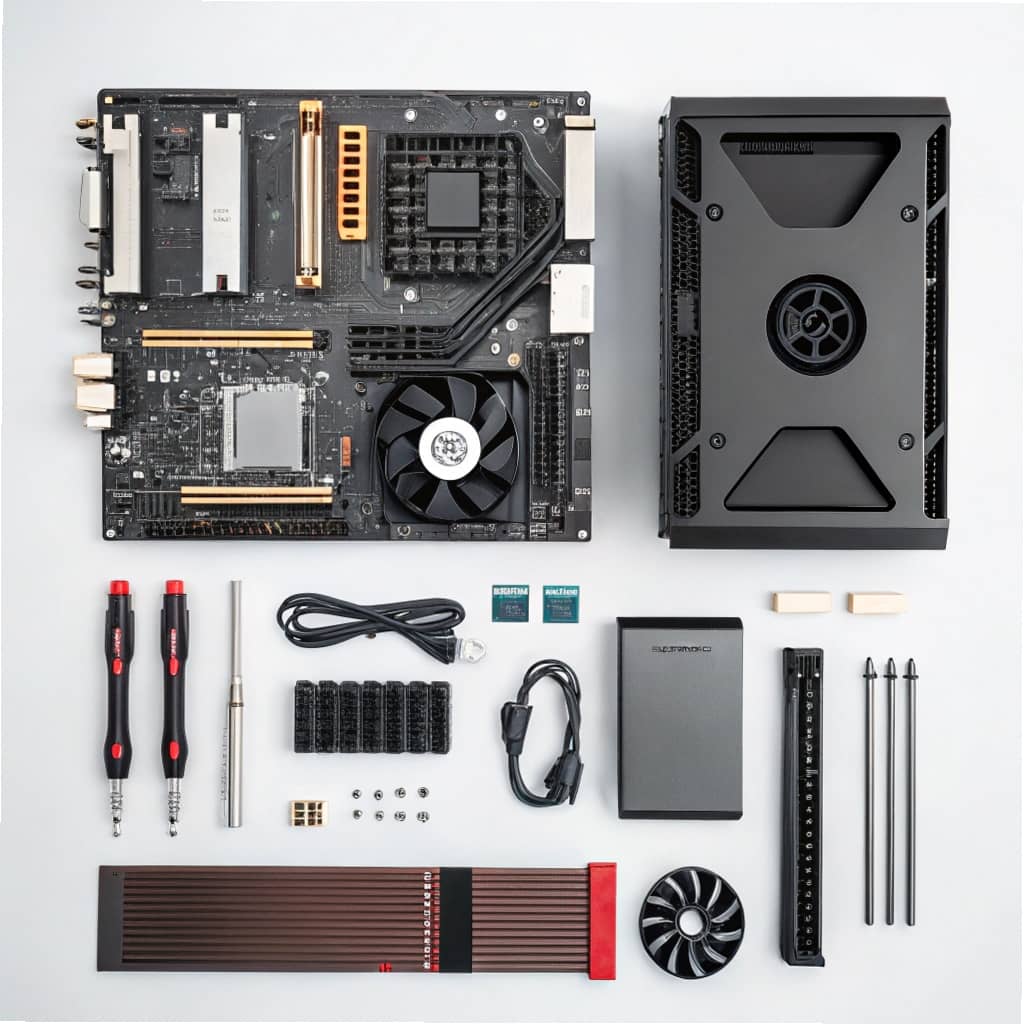
- A magnetic screwdriver to prevent the loss of small screws.
- An anti-static wrist strap or mat protects sensitive components from electrostatic discharge (ESD).
- Flashlight for improved visibility in low-light areas of the case.
- Zip ties or Velcro straps for efficient cable management.
- Thermal paste (if not pre-applied to the CPU cooler).
2. Verify Component Compatibility
Compatibility between components is critical to avoid costly mistakes. Cross-reference the following:
- CPU and Motherboard: Ensure the CPU socket type (e.g., AM4, LGA 1700) matches the motherboard.
- RAM and Motherboard: Check supported RAM speeds and maximum capacity.
- GPU and Case: Confirm the graphics card fits within the case dimensions.
- PSU Wattage: Use online calculators to ensure the power supply meets the system’s requirements.
3. Prepare a Clean and Organized Workspace
Select a flat, well-lit surface with ample space to organize components and tools. Avoid carpeted areas to reduce static buildup, and keep liquids and food away to prevent accidental spills.
4. Review Documentation and Tutorials
Please familiarize yourself with the motherboard manual, which provides crucial information on connector layouts, BIOS settings, and troubleshooting. Watch video tutorials or read guides specific to your components to gain practical insights.
5. Plan for Cable Management
Effective cable management not only improves airflow but also enhances the aesthetics and longevity of your build. Plan routing power cables, SATA cables, and front-panel connectors to avoid clutter.
Buying Parts: Where to Save Money
Constructing a gaming PC can be a significant financial investment, but strategic purchasing decisions can substantially reduce costs without compromising performance. This section explores evidence-based approaches to acquiring high-quality components at optimal prices, ensuring that novice and experienced builders can maximize value while adhering to budgetary constraints.
1. Prioritize Value-Oriented Components
Specific components offer a higher return on investment (ROI) and should be prioritized when budgeting:
- CPU: Mid-range processors, such as AMD Ryzen 5 or Intel Core i5, often provide the best balance between cost and performance for gaming.
- GPU: Consider previous-generation graphics cards (e.g., NVIDIA RTX 30-series or AMD RX 6000-series), which deliver excellent performance at reduced prices.
- RAM: Opt for 16GB of DDR4 memory, as it balances affordability and gaming requirements.
2. Leverage Seasonal Sales and Discounts
Timing purchases to coincide with major sales events, such as Black Friday, Cyber Monday, or Amazon Prime Day, can yield significant savings. Additionally, monitor price-tracking tools like PCPartPicker or Honey to identify price drops and historical trends.
3. Explore Refurbished and Open-Box Options
Refurbished or open-box components, often available at a fraction of their original cost, can be a viable option for cost-conscious builders. Ensure these items come with a warranty and are sourced from reputable retailers or manufacturers.
4. Avoid Overspending on Aesthetics
While RGB lighting and premium cases may enhance visual appeal, they often contribute little to performance. Allocate savings from aesthetic compromises toward critical components like the GPU or CPU.
5. Utilize Second-Hand Markets
Platforms like eBay, Facebook Marketplace, or local classifieds can offer substantial savings on used components—exercise caution by verifying the seller’s reputation and testing components before purchase.
6. Bundle Deals and Combo Discounts
Retailers frequently offer discounts on component bundles, such as CPU and motherboard combos. These packages can provide significant savings while ensuring compatibility.
Step-by-Step Guide to Building Your Gaming PC:
Building a gaming PC requires precision, attention to detail, and adherence to best practices. This step-by-step guide ensures even beginners can achieve professional results, minimizing errors, optimizing performance, and enhancing the system’s longevity.
1. Install the CPU
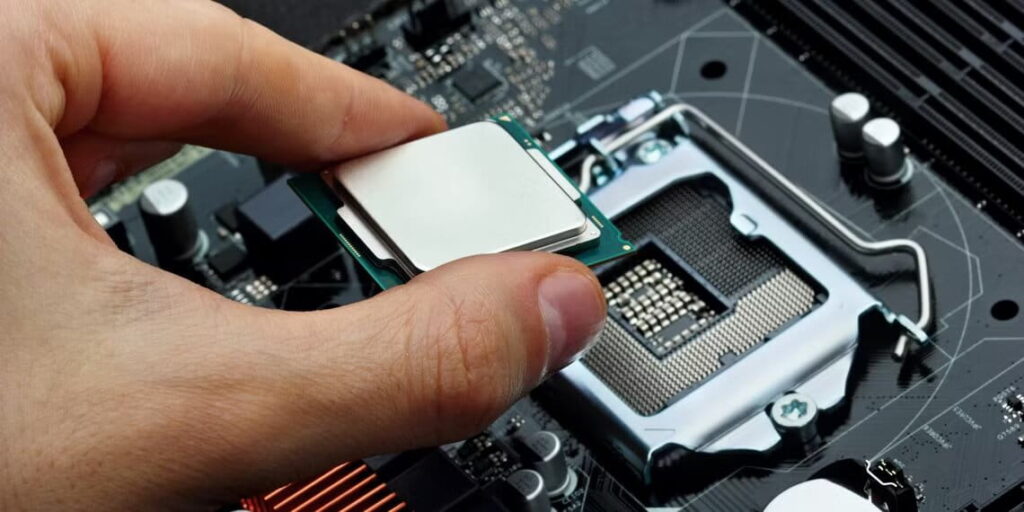
Begin by carefully aligning the CPU with the socket on the motherboard. Most modern CPUs feature a golden triangle or notch to guide proper orientation. Place the CPU into the socket without force and secure it by lowering the retention arm.
2. Attach the CPU Cooler
Apply a pea-sized amount of thermal paste to the CPU if the cooler does not come with pre-applied paste. Secure the cooler according to the manufacturer’s instructions, ensuring even pressure to avoid thermal inefficiencies.
3. Install the RAM
Find the DIMM slots on the motherboard and release the retention clips. Line up the notch on the RAM stick with the slot, then press down firmly until the clips lock into place. To maximize performance, refer to the motherboard manual for the ideal slot configuration for dual-channel memory.
4. Mount the Motherboard
Position the motherboard inside the case, aligning it with the pre-installed standoffs. Use the included screws to firmly secure the motherboard, ensuring it is stable and properly anchored to avoid movement or potential short circuits.
5. Install the Storage Drives
For SSDs or HDDs, mount the drives in the designated bays within the case. Connect the SATA data cable to the motherboard and the SATA power cable from the power supply unit (PSU). For NVMe SSDs, insert the drive into the M.2 slot on the motherboard and secure it with a screw.
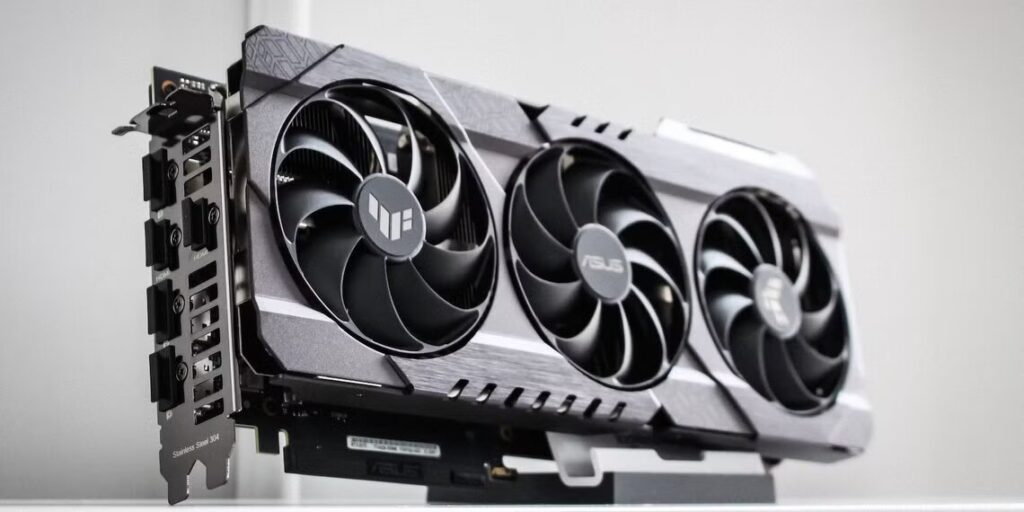
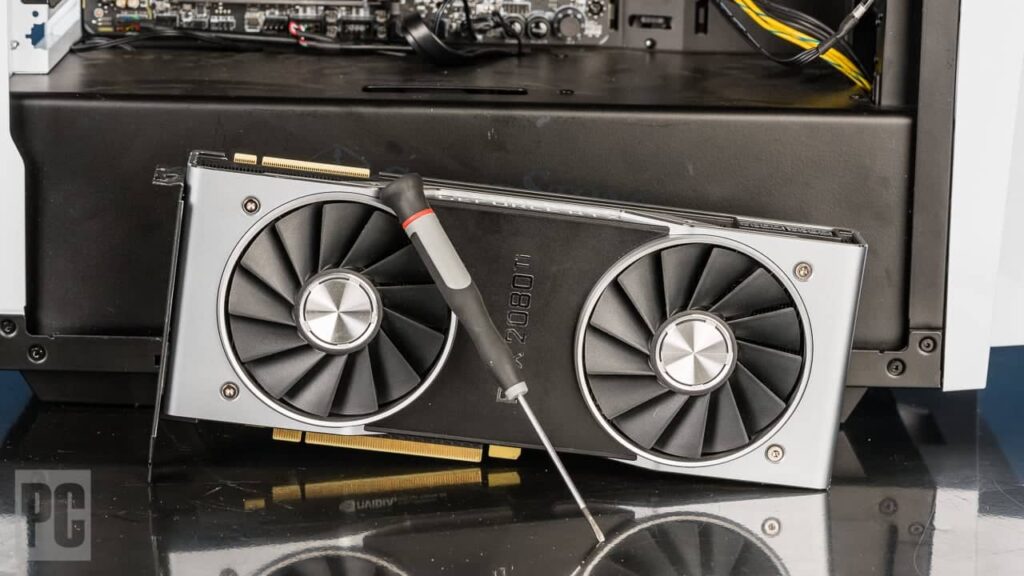
6. Install the GPU
Take off the relevant PCIe slot covers from the case. Align the GPU with the PCIe x16 slot on the motherboard and press it down firmly until it clicks into position. Secure the GPU to the case with screws and attach the required power cables from the PSU.
7. Connect the Power Supply
Mount the PSU in the designated area of the case and connect the necessary cables:
- 24-pin ATX power cable to the motherboard.
- 8-pin CPU power cable to the motherboard.
- PCIe power cables to the GPU.
- SATA power cables to storage drives.
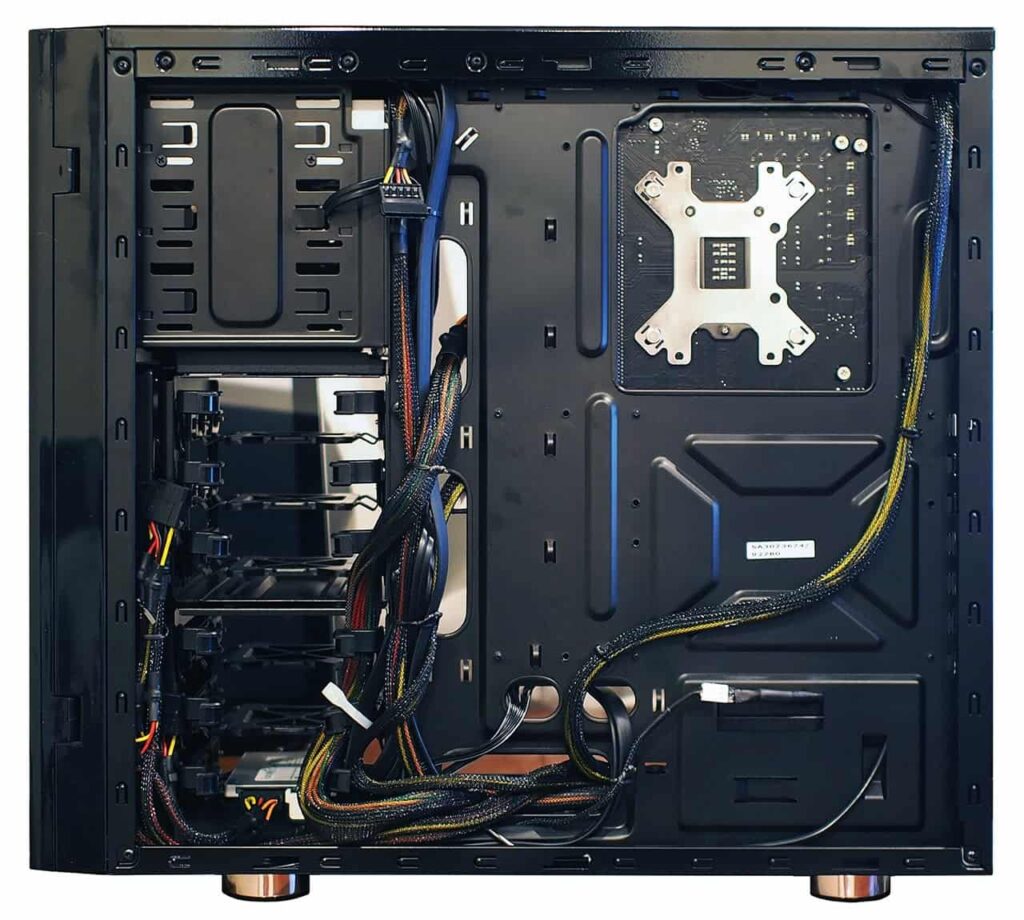
8. Cable Management
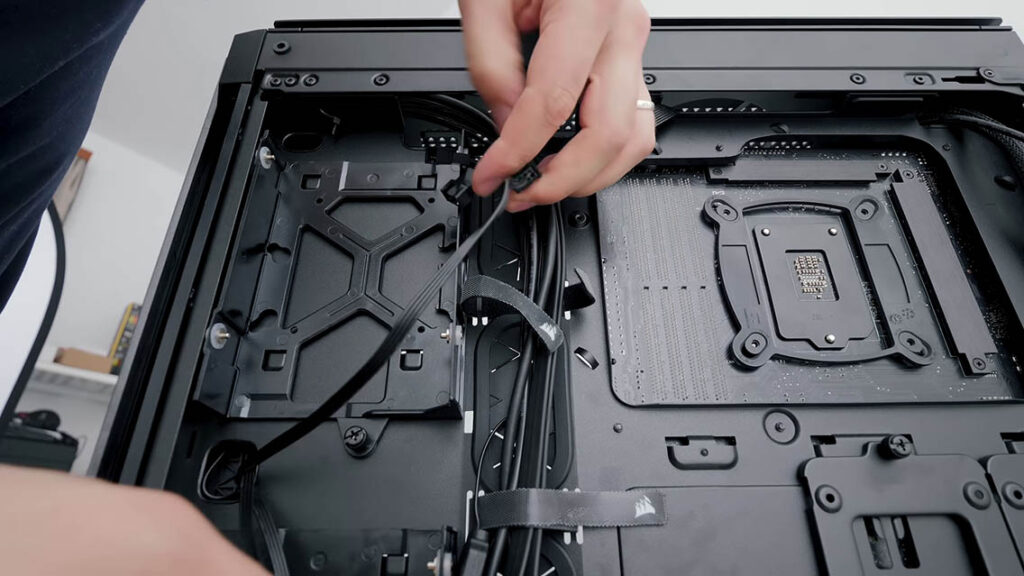
Organize cables using zip ties or Velcro straps to improve airflow and aesthetics. Route cables behind the motherboard tray whenever possible to maintain a clean and efficient build.
9. Connect Front-Panel Headers
Refer to the motherboard manual to connect the front-panel headers, including the power switch, reset switch, USB ports, and audio jacks.
10. Power On and Test
Double-check all connections, then power on the system. Enter the BIOS to verify that all components are recognized and configure settings such as boot order and RAM speed.
First Boot: What to Do If It Doesn’t Work
- Verify Power Connections: Ensure the 24-pin ATX, 8-pin CPU, PCIe, and SATA power cables are securely connected.
- Check RAM Installation:
- Reseat RAM sticks firmly into DIMM slots until retention clips click.
- Confirm the correct slot configuration for dual-channel memory.
- Inspect GPU Seating:
- Remove and reinsert the GPU firmly into the PCIe slot.
- Ensure PCIe power cables are securely connected.
- Examine Front-Panel Headers: Using the motherboard manual, verify the correct power switch placement and other front-panel connectors.
- Listen for Beep Codes or Debug LEDs: Use motherboard beep codes or debug LEDs to identify hardware issues (e.g., CPU, RAM, GPU).
- Clear CMOS: Reset BIOS settings by removing the CMOS battery or using the designated jumper.
- Test with Minimal Configuration: Boot with only CPU, one stick of RAM, and GPU to isolate the problem.
- Seek Professional Assistance: Consult a technician or contact component manufacturers if issues persist.
Post-Build Setup
The post-build phase begins after assembling a gaming PC, focusing on configuring, optimizing, and preparing the system for peak performance. This section outlines essential steps to ensure the PC operates efficiently and securely and meets the user’s gaming and productivity needs.
1. Install the Operating System
The first step in the post-build process is installing an operating system (OS). For most users, this will involve:
- Creating a bootable USB drive with the latest version of Windows or a preferred Linux distribution.
- Configuring the BIOS to prioritize the USB drive as the primary boot device.
- Following the on-screen instructions to complete the OS installation, including partitioning the storage drives and setting up user accounts.
2. Update Drivers and Firmware
Ensuring that all hardware components are running the latest drivers and firmware is essential for stability and performance. Key updates include:
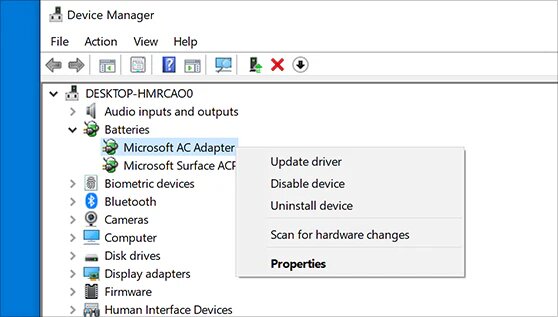
- GPU Drivers: Download and install the latest drivers from NVIDIA or AMD’s official websites.
- Motherboard BIOS: Check the manufacturer’s website for updates that improve compatibility and performance.
- Peripheral Drivers: Install drivers for peripherals such as keyboards, mice, and headsets to enable advanced features.
3. Configure System Settings
Optimize the system settings to enhance performance and usability:
- Power Settings: Adjust the power plan to prioritize performance over energy savings.
- Display Settings: Configure resolution, refresh rate, and colour calibration to match the monitor’s capabilities.
- Network Settings: Ensure a stable and secure internet connection, particularly for online gaming.
4. Install Essential Software
Equip the system with software that enhances functionality and security:
- Antivirus and Security Software: Protect the system from malware and cyber threats.
- System Monitoring Tools: Use applications like HWMonitor or MSI Afterburner to track temperatures, clock speeds, and usage statistics.
- Game Launchers: Install platforms like Steam, Epic Games Store, or GOG to manage and update games.
5. Benchmark and Stress Test
Validate the system’s stability and performance through benchmarking and stress testing:
- CPU and GPU Benchmarks: Use tools like Cinebench or 3DMark to assess performance.
- Stress Testing: Run applications such as Prime95 or FurMark to ensure the system can handle sustained loads without overheating or crashing.
6. Personalize and Customize
Tailor the system to reflect personal preferences and improve user experience:
- Aesthetic Customization: Install RGB control software to synchronize lighting effects across components.
- User Interface: Customize the desktop environment, taskbar, and shortcuts for ease of use.
- Backup Solutions: Set up automated backups to protect essential data.
Future Upgrades Made Easy
1. Prioritize Upgradeable Components:
- Choose a motherboard with extra PCIe slots, M.2 slots, and high RAM support.
- Invest in a high-quality, modular PSU with sufficient wattage.
- Select a case with space for larger GPUs, cooling solutions, and storage.
2. GPU Upgrades:
- Ensure compatibility with the PSU and case dimensions.
- Opt for GPUs supporting the latest technologies like ray tracing and DLSS.
3. CPU and Cooling Solutions:
- Verify compatibility with the motherboard socket.
- Upgrade cooling solutions to handle higher thermal output.
4. RAM and Storage:
- Add or replace RAM modules for higher capacity and speed.
- Upgrade to faster NVMe SSDs or add extra storage drives.
5. Monitor and Peripherals:
- Upgrade to higher refresh rates (e.g., 144Hz, 240Hz) or resolutions (e.g., 1440p, 4K).
- Invest in mechanical keyboards, high-DPI mice, and immersive headsets.
6. Software and Firmware Updates:
- Regularly update the motherboard BIOS for new CPU and feature support.
- Keep GPU, chipset, and peripheral drivers updated for stability and performance.
Final Tip: Avoid These Mistakes
Even experienced builders can encounter pitfalls during the assembly of a gaming PC. Recognizing and avoiding common mistakes is essential to ensuring a smooth build process, optimal performance, and long-term system reliability. Below, we outline critical errors to avoid and strategies to mitigate them.
1. Neglecting Component Compatibility
One of the most frequent mistakes is failing to verify compatibility between components. Pairing a CPU with an incompatible motherboard socket or selecting a GPU that exceeds the case’s dimensions can lead to costly delays. Always cross-reference specifications and use tools like PCPartPicker to confirm compatibility.
2. Overlooking Proper Cable Management
Poor cable management obstructs airflow, leading to higher temperatures, and complicates future upgrades and maintenance. Use zip ties, Velcro straps, and case routing channels to organize cables neatly, ensuring functionality and aesthetics.
3. Applying Excessive Thermal Paste
While thermal paste is necessary for efficient heat transfer, applying too much can cause overheating by creating an insulating layer. A pea-sized amount is typically sufficient for optimal thermal conductivity between the CPU and cooler.
4. Skipping BIOS Updates
Failing to update the motherboard BIOS can result in compatibility issues, particularly with newer CPUs or RAM modules. Regularly check the manufacturer’s website for updates and follow their instructions carefully to avoid bricking the motherboard.
5. Ignoring Static Electricity Precautions
Static discharge can damage sensitive components. Always ground yourself by touching the case or using an anti-static wrist strap before handling parts. Avoid working on carpeted surfaces to minimize static buildup.
6. Forgetting Motherboard Standoffs
Installing the motherboard without standoffs can cause short circuits, potentially damaging the board and other components. Ensure standoffs are pre-installed in the case and aligned with the motherboard’s screw holes.
7. Overlooking Power Supply Wattage
Underestimating the power supply’s wattage can lead to system instability or failure. Use online PSU calculators to determine the required wattage, accounting for future upgrades and peak power demands.
FAQ’s
1. How to build a gaming PC for beginners?
Building a gaming PC for beginners involves selecting compatible components, following a step-by-step assembly guide, and ensuring proper installation of the CPU, GPU, RAM, and storage. Start with a detailed plan, use beginner-friendly resources, and prioritize cable management and BIOS setup for optimal performance.
2. How Much Does It Cost To Build A Gaming PC?
The cost to build a gaming PC varies based on performance needs, ranging from $500–$700 for budget builds, $1,000–$1,500 for mid-range setups, and $2,000+ for high-end systems. Prices depend on component choices, such as the GPU, CPU, and storage and current market trends.
3. What Do I Need To Build A Gaming PC?
To build a gaming PC, you need essential components like a CPU, GPU, motherboard, RAM, storage (SSD/HDD), power supply (PSU), and a case, along with tools such as a screwdriver and thermal paste. Ensure compatibility between parts and follow a detailed guide for assembly and setup.
4. How Much RAM Should A Gaming PC Have?
For optimal gaming performance, 16GB of RAM is the recommended standard, balancing affordability and capability for most modern games. However, 32GB may be preferred for future-proofing or multitasking with demanding applications.
5. How To Build A Gaming PC On A Budget?
To build a budget gaming PC, prioritize cost-effective components like mid-range CPUs (e.g., AMD Ryzen 5), previous-generation GPUs, and 16GB of RAM, while avoiding unnecessary aesthetics. Use price-tracking tools and consider refurbished or open-box parts to maximize savings without compromising performance.
Summery:
This comprehensive guide walks you through building a gaming PC, from selecting compatible components to step-by-step assembly and post-build optimization. Learn how to save money, avoid common mistakes, and future-proof your system with upgrade tips. Perfect for beginners, this guide ensures a smooth, cost-effective build for peak gaming performance.
